How to Create a Professional Website That Attracts Clients
Every great website starts by answering two simple but powerful questions: Who is this for? and What do I want them to do? For designers, developers, and entrepreneurs, a solid plan is the one thing that separates a website that performs from a pretty but ineffective digital brochure.
Your Blueprint for a Website That Works
As a designer, it's tempting to jump straight into the visual fun of building a website. We get caught up in picking colors and fonts, only to realize months later that our site isn't connecting with visitors or helping our business. The real secret to creating a professional website that gets results happens before you even open Framer.
A truly successful website is built on a crystal clear understanding of its purpose and its audience. Without that clarity, you're just designing in the dark. This guide will show you how to lay that essential foundation and build better websites faster.
Start with Your Business Goals
First things first: what does success actually look like for your project? The primary job of your website will shape every single decision you make, from the homepage layout to the words on your call to action buttons.
Are you trying to:
Generate qualified leads? If so, your site needs prominent contact forms, detailed service pages, and trust builders like client testimonials.
Showcase a portfolio? Your focus will be on stunning visuals, detailed project case studies, and making it dead simple for potential clients to see the quality of your work.
Drive direct sales? This means you need a frictionless ecommerce experience with clear product pages and a checkout process that's smooth as butter.
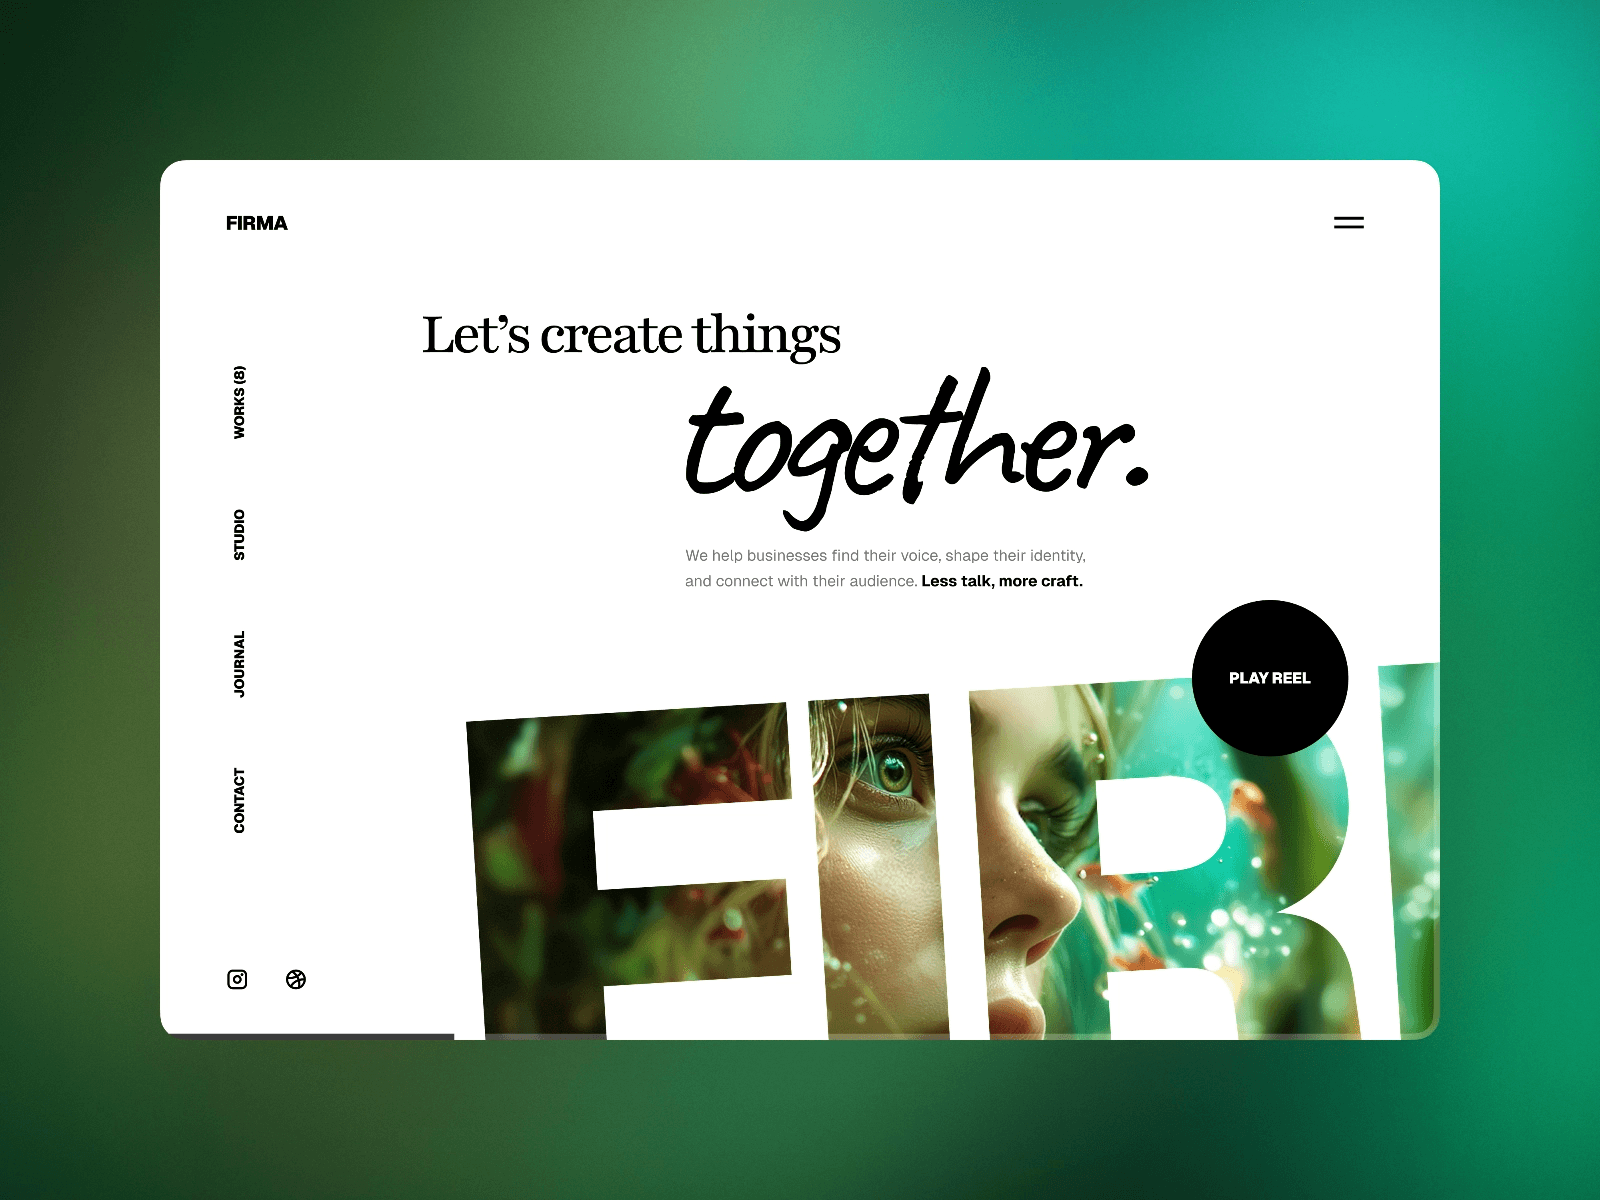
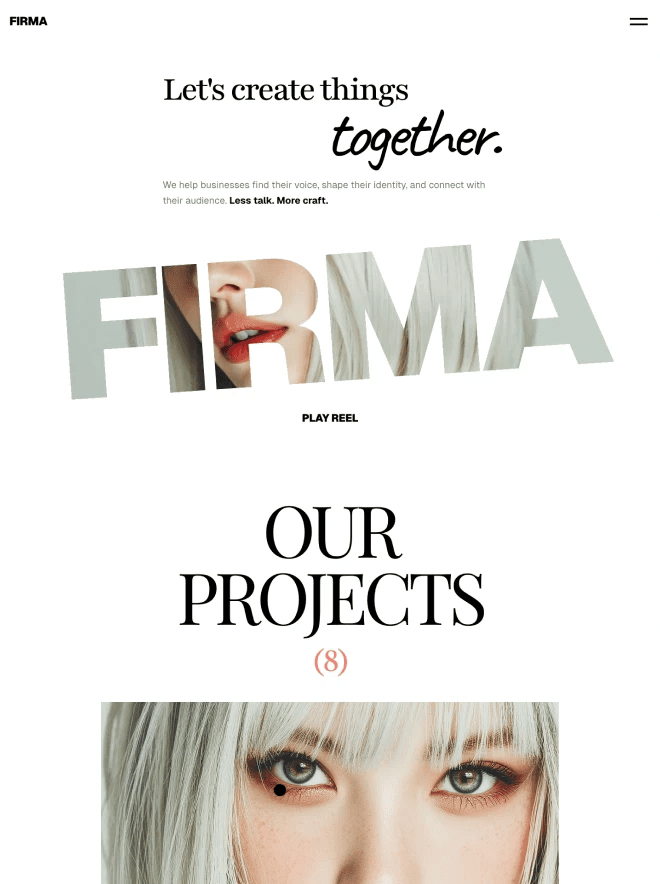
Having a clear goal helps you avoid the most common pitfall: building a website that's all style and no substance. For example, a creative agency using a portfolio focused template like LaunchNow's Mugen would naturally prioritize its project galleries over a complex lead form, because its main goal is to show, not just tell.
Understand Your Ideal Visitor
Once you know your destination, you need to know who you're taking with you. Creating a user persona isn't just a marketing exercise; it's about getting inside their head and understanding their motivations, frustrations, and what they need to see to trust you.
Ask yourself these questions:
What specific problem does my ideal visitor have that I can solve?
What key information are they desperately looking for when they land on my site?
What will make them feel confident enough to take the next step with me?
A SaaS founder targeting enterprise clients has a completely different audience than a freelance photographer targeting newly engaged couples. The founder needs to present data, case studies, and security info. The photographer needs to create an emotional connection with beautiful imagery and simple pricing. This understanding is what guides your tone, content, and every design choice you make.
Map the User Journey
With your goals and audience clearly defined, you can start mapping out the ideal path a visitor should take on your site. This journey becomes your sitemap—the architectural blueprint for your entire website. A common journey might look something like this: Homepage → Services Page → Case Study → Contact Page.
To help you organize this crucial stage, I've put together a checklist that I use with my own clients. It ensures we've covered all the foundational bases before we dive into the design and build phases in Framer.
Core Website Planning Checklist
Use this checklist to structure your initial website plan and ensure all foundational elements are in place before you start building in Framer.
Planning Element | Key Question to Answer | Framer Tip |
|---|---|---|
Primary Business Goal | What is the number one action you want a visitor to take? | Choose a template with a layout that naturally supports this goal (like a strong hero CTA for lead generation). |
Target Audience | Who is your ideal customer? Describe their main pain point. | Your audience's technical knowledge will influence design complexity. Keep it simple for non technical users. |
Core Value Proposition | Why should they choose you over competitors? (In one sentence) | Make sure this statement is front and center on your homepage, often in the hero section. |
Essential Pages | What pages are absolutely necessary to achieve your goal? (Home, About, Services, Contact, etc.) | Create these pages first in Framer. You can always add more later, but the core structure is key. |
Key Call to Action | What is the primary button text you'll use? (like "Get a Quote," "View Our Work," "Buy Now") | Use Framer's "Components" feature to create a master CTA button you can reuse throughout your site for consistency. |
Visual Identity | What are your brand colors, fonts, and logo? | Set these up in Framer's "Styles" and "Assets" panels first to speed up the entire design process. |
This upfront work makes the entire build process smoother and far more effective. It turns what could be a chaotic mess into a logical, step by step assembly.
A well planned user journey feels effortless. It anticipates the visitor's next question and provides a clear, logical path to the answer, guiding them naturally toward your primary call to action.
This strategic groundwork is more important than ever. Globally, there are over 1.13 billion websites, but only around 18% of them are active and regularly maintained. These website statistics paint a clear picture of the competitive landscape. Planning is what will ensure your site is part of that active, effective minority.
By combining a smart plan with the incredible speed of a tool like Framer and a premium template, you're not just building another site—you're engineering a professional, client attracting machine right from the start.
Choosing and Customizing Your Framer Template
With your website's core purpose locked in, it's time for the fun part: picking your foundation. Choosing a Framer template is more than just a cosmetic decision—it's a strategic one. The right template is your biggest shortcut to a professional launch, while the wrong one can feel like building on a shaky foundation.
So what's the real difference between a decent template and a great one? It's all about what's under the hood: the quality of the component architecture, the elegance of the CMS, and its ability to grow with you. This is where you shift from just looking at aesthetics to thinking like a pro.
How to Spot a Quality Framer Template
It's easy to get sidetracked by flashy animations and trendy designs. But experienced designers, developers, and entrepreneurs know that the best templates are built with a deep sense of order and purpose. Before you click "purchase," put your potential template through this checklist.
Clean Component Structure: This is non negotiable. A top tier template will have components that are logically named and organized. When you need to change a button, you should be able to edit one master component and watch that change apply everywhere. This alone saves hours of work.
Built for Scalability: Does the design system feel solid? Look for well organized color and font styles in the Styles panel. A professionally built template lets you update your entire brand palette in seconds by just tweaking a few style variables. That's the sign of a robust system.
Smart CMS Integration: Check if the template comes with pre built CMS collections for things you'll actually use, like a blog, portfolio, or case studies. A thoughtfully designed CMS means you can skip the technical setup and get right to creating content.
SEO and Performance from Day One: The best templates are built with search engine optimization baked in. This means logical heading structures (H1, H2, H3), lightweight assets, and flawless mobile responsiveness are already taken care of.
Exploring the LaunchNow Framer templates can give you a clear benchmark for what professional grade structure and optimization look like. It helps you know what to demand from any template you choose.
A professional template isn't just a skin; it's a complete design system. It anticipates your needs for customization and scalability, providing a framework that is both flexible and powerful, dramatically speeding up the process of how to create a professional website.
Making the Template Your Own
Once you've selected your template, the real transformation begins. This is where you inject your brand's DNA into the pre built structure. Framer makes this incredibly fast, as long as you work smart.
First, head straight to the Assets panel. Don't touch a single thing on the page yet. Your mission here is to set up your Global Styles. Update the primary, secondary, and accent colors to match your brand guide. Then, do the same for your typography—your heading and body fonts.
This one move radically changes the entire look and feel of the site. Because premium templates are built with these styles, your changes ripple across every page, ensuring perfect brand consistency without you having to manually edit a thing. It's the highest impact action you can take to build faster.
Swapping Placeholders for Powerful Content
With your brand's visual identity locked in, it's time to breathe life into the site by replacing the placeholder content. This is a critical step that too many people rush through. Remember, your words and images are what will ultimately connect with your audience and persuade them to act.
Here's an actionable game plan to tackle this efficiently:
Start with the Homepage: This is your digital storefront. Focus on rewriting the hero section headline and subheadline first. They need to clearly and concisely communicate your value proposition. What do you do, and why should anyone care?
Systematically Replace Visuals: Gather all your brand photography, logos, and illustrations. Then, go page by page and methodically swap out every placeholder image with your own quality assets.
Activate the CMS: If your template has a blog or portfolio, open the CMS tab. Your first task is to delete all the sample posts. Then, start adding your own projects, articles, or testimonials. This instantly makes the website feel real and populates all the dynamic sections with your actual work.
By following this disciplined approach, you can take a premium Framer template from a starting point to a fully customized, professional website in a matter of hours, not weeks. You get to keep the polished design and robust architecture while creating a final product that is unmistakably yours.
Designing for Engagement and Conversion
A professional website does more than just look good—it has to work for you. It should be an active participant in your business, guiding visitors and nudging them toward a specific action. This is where user experience and conversion focused design come together, turning casual browsers into paying clients.
Let's move beyond abstract ideas and get into the practical techniques you can use in Framer to make your site far more effective. It's not about cramming more stuff onto the page. It's about making every single element earn its keep.
With people spending around six and a half hours online every day, decisions are made in a blink. You have seconds, not minutes, to capture their attention. A huge part of that is making your value proposition crystal clear from the moment the page loads.
Guiding the User's Eye
Visual hierarchy is a design term for a simple concept: arranging things on a page to show what's most important. A strong hierarchy tells your visitor exactly what to look at first, second, and third, which keeps them from feeling overwhelmed and clicking away.
Inside Framer, you can master this with just a few key adjustments:
Size and Scale: Your main headline should be the biggest thing they see. It's that simple.
Color and Contrast: Use your brand's boldest, most vibrant color for your call to action buttons. A button that blends in might as well not be there.
Negative Space: Don't be afraid of empty space! Giving your key elements room to breathe is like putting a spotlight on them. It draws the eye right where you want it to go.
A great design isn't finished when there's nothing left to add, but when there's nothing left to take away. Every element needs a purpose. If it doesn't help the user or support your business goal, it's just noise.
Crafting Compelling Calls to Action
Your call to action is arguably the most important button on your entire site. It's the final bridge between a visitor being interested and becoming a customer. A generic CTA like "Learn More" is a massive missed opportunity. Your buttons need to scream value and action.
For instance, which of these sounds more compelling?
Vague: Submit
Specific: Get Your Free Proposal
Framer's Components feature is a game changer here. You can create one perfect CTA component, complete with your ideal design and hover states, and then reuse it everywhere. If you decide to test new copy, you just update the text on each instance without touching the design. That kind of consistency is a hallmark of a truly professional website.
Using Animation to Enhance, Not Distract
Animations can give your site a premium feel, but they must be subtle and have a clear purpose. The best animations are the ones that provide feedback or guide attention without ever stealing the show.
You can easily add tasteful motion in Framer:
Hover Effects: A slight "grow" or "lift" effect when someone hovers over a button or portfolio image lets them know it's interactive. It's a small but satisfying piece of feedback.
Appear Effects: As a user scrolls, have sections gently "fade in" or "slide up." This creates a dynamic, modern feel without being jarring.
Layout Animations: When someone clicks a filter on your portfolio, Framer's layout animations can smoothly rearrange the grid. It's a touch of magic that makes the experience feel seamless.
Premium templates, like those from LaunchNow, often come with these kinds of performant animations already built in, showing just how much a little motion can add a layer of polish.
Building Trust with Strategic Placement
Finally, you have to build trust. You can't convert a visitor who doesn't trust you. This means placing social proof and contact information where it matters most—not buried on some forgotten page.
Put customer testimonials right below the feature they're praising. Showcase short case study summaries on your homepage with a clear link to the full story. And please, make sure a contact form or a "Schedule a Call" button is easily accessible from every single service page. You want to make it effortless for someone to take the next step the very moment they feel convinced.
Getting Found: A Guide to SEO and Performance
So, you've designed a stunning website. That's a huge accomplishment, but it's only half the battle. What happens if no one can find it? Or worse, what if they find it, click, and then leave because it takes forever to load?
A beautiful site that's invisible to Google or slow to respond is a missed opportunity. This is where we need to get a little technical—but don't worry. Framer gives you all the tools you need to tune up your site's performance and SEO without touching a line of code.
Let's walk through the actionable steps to ensure your site gets seen and delivers a fantastic, lightning fast experience to every visitor.
Mastering SEO in Framer
SEO is all about giving search engines like Google clear signals about what your content is about. When you get this right, you rank higher and attract more of the right kind of traffic.
The good news? All these settings are easily accessible right inside Framer's Page settings panel on the right. No digging through confusing dashboards.
SEO Checklist for Framer Sites
This checklist covers the fundamental elements you should optimize for every page on your Framer site. Getting these right is crucial for helping search engines understand and rank your content.
SEO Element | Best Practice | Where to Find it in Framer |
|---|---|---|
Title Tag | Keep it under 60 characters. Include your main keyword and make it compelling. This is your search result headline. | Page Settings > SEO & Social > Title |
Meta Description | Write a clear summary around 155 characters long. It should entice users to click. | Page Settings > SEO & Social > Description |
Heading Structure | Use one H1 per page for the main title. Use H2s and H3s to structure the rest of the content logically. | Select any text element > Style Panel > Size > Tag |
Image Alt Text | Add descriptive text to every image. This helps with accessibility and image search rankings. | Select an image > Style Panel > Fill > Image > Alt |
By focusing on these four areas, you're building a solid SEO foundation that search engines will love.
Framer Best Practice: When you start with a premium template, you're not starting from zero. Many LaunchNow templates, for example, are built with a logical heading structure already in place, giving you a significant head start on your SEO.
Don't Keep Your Visitors Waiting: Boost Site Speed
Site speed is more than just a technical metric; it's a core part of the user experience. We've all clicked a link and stared at a blank white screen. It's frustrating. Google feels the same way and prioritizes faster sites in its search results.
Framer is incredibly fast out of the box and handles a lot of the heavy lifting for you. Still, a few small tweaks can make a big difference.
Optimize Your Images: Large, resolution heavy images are the number one killer of page speed. Before you upload anything, run it through a free tool like TinyPNG or Squoosh. You can often cut the file size by 50% or more without any noticeable drop in quality.
Let Lazy Loading Do Its Thing: Framer automatically "lazy loads" your images, meaning they only load when a user actually scrolls them into view. It's a massive performance win that's enabled by default.
Be Smart with Fonts: It's tempting to use multiple custom fonts, but each one adds to the page's load time. For peak performance, try to stick to just two: one for headlines and one for body copy.
Once you have these fundamentals locked in, you can explore more advanced strategies to really pull ahead of the competition. For designers and entrepreneurs looking for a head start, a pre optimized theme like LaunchNow's portfolio template is a perfect example of a foundation built for performance. It lets you focus on your content and creative vision, confident that the technical side is already taken care of.
Your Launch Checklist for a Flawless Debut
The final moments before your website goes live are your last chance to catch those small mistakes that can make a big, unprofessional impression. A meticulous launch check is what separates a polished, professional site from one that just feels… off.
To help you launch with complete confidence, here is a practical checklist. These are the exact steps to run through to make sure every site you build is perfect from the moment it's published.
Cross Device and Browser Testing
Your website might look fantastic on your 27 inch monitor, but how does it hold up on an iPhone 13? Or a Samsung tablet? With over 50% of all web traffic now coming from mobile devices, you simply can't afford to skip this step.
Framer's built in responsive previews for desktop, tablet, and mobile are an excellent starting point. Use them religiously throughout your design process. But nothing beats testing on actual hardware.
Mobile First: Check every page on both an iPhone and an Android device. Pay close attention to the navigation menu, button sizes (are they actually easy to tap?), and font legibility.
Tablet Check: Test in both portrait and landscape modes. This simple orientation change can sometimes reveal awkward layout shifts.
Major Browsers: Preview your site on the latest versions of Chrome, Safari, and Firefox. You'd be surprised how small rendering differences can still pop up.
The Final Content Polish
You've poured hours into the design; don't let a simple typo torpedo your credibility. A final, thorough proofread is absolutely essential. Go through every single page—from the homepage hero section right down to the legal text in the footer.
But it goes beyond just spelling and grammar. You need to test every single interactive element on your site.
Link Integrity: Click every link. And I mean every link—navigation menus, call to action buttons, and text links. A broken link is a dead end for your visitor and a major sign of carelessness.
Form Functionality: This is a big one. Fill out and submit every form on your website. Did the success message appear? And more importantly, did you actually receive the submission in your email or connected tool? This is one of the most common points of failure.
Framer Best Practice: Set up a filter in your email client to automatically label and star form submissions. This keeps important leads from getting lost in the shuffle and helps you respond quickly.
Technical Setup and Integration
With the visuals and content locked in, it's time for the final technical connections. These are the steps that turn your project into a live, professional website. Thankfully, Framer makes this process incredibly straightforward.
First, connect your custom domain. Inside your Framer project, go to Site Settings > Domains. Framer gives you clear, step by step instructions for adding the necessary DNS records with your domain registrar.
Next, polish your site's identity:
Set Your Favicon: This is the small icon in the browser tab. Upload a simple, clear version of your logo in Site Settings > General.
Configure Social Share Images: In Site Settings > SEO & Social, upload a custom image for each page. This is the image that appears when someone shares your link on platforms like Twitter, LinkedIn, or Facebook.
Finally, integrate your analytics. Whether you prefer Google Analytics or a privacy focused option like Fathom, you can add your tracking code in Site Settings > General > Custom Code. This is vital for understanding your audience and measuring your site's performance after you launch.
If you hit any snags during this final setup, especially with domain configurations, the official Framer documentation is excellent.
Frequently Asked Questions
As you get ready to dive into Framer, it's natural for questions to pop up. Below, I've answered some of the most common things that designers, entrepreneurs, and agencies ask when they're starting out with premium templates.
How Much Does It Cost to Create a Professional Website with Framer?
Your total cost will have two main components: the Framer plan and the template itself.
Framer has a great free plan for getting started, but to launch a professional site, you'll want a paid subscription. These plans usually run from $15 to $30 per month and are essential for adding a custom domain and removing Framer's branding—a must for looking credible.
The second part of the investment is the template. A premium template from LaunchNow is a one time purchase, often between $99 and $199. For any serious business or freelance practice, this is an incredible return on investment, as it saves you dozens of hours in design and development.
Can I Really Build a Website with No Coding Knowledge?
Yes, absolutely. That's the magic of Framer. It's a visual first platform that lets you design and publish production quality websites without ever touching a line of code.
When you begin with a quality template, all the heavy lifting—the responsive design, the intricate animations, the site structure—is already done for you. Your job is to make it yours by swapping in your brand's content, colors, and images. While coding knowledge can open doors to specific custom features down the road, it's not a barrier to entry.
How Long Does It Take to Build a Site with a Framer Template?
This comes down to how prepared you are.
If you have all your assets ready—your branding guidelines, website copy, and images—you could realistically customize a premium template and go live in a single weekend. I've seen it happen.
If you're still figuring out your content and brand identity as you build, it might take a week or two. The template completely bypasses the traditional design and development phases, which can stretch on for months. This speed is exactly why so many founders and agencies are making the switch.
Framer Best Practice: Using a template isn't about cutting corners; it's about being strategic. By leveraging a pre built, professional foundation, you can redirect your valuable time from tedious setup to activities like content creation and marketing.
For example, you could spend weeks building a portfolio from scratch. Or, you could use a purpose built template like the Launchfolio and have a client ready site live in a couple of days.
What Does Website Maintenance Look Like with Framer?
This is where Framer truly shines, especially for users coming from platforms like WordPress. Maintenance is incredibly simple because you never have to worry about:
Plugin updates
Security patches
Server management
Framer's team handles all that backend work for you. It's a huge weight off your shoulders. For content updates, you can either jump into the visual editor for quick text or image changes, or use the built in Framer CMS to manage your blog posts and portfolio. The whole process feels more like editing a slide deck than managing a website.
What's Next?
Now that you have the complete blueprint for creating a professional website, the next step is to take action.
Define Your Strategy: Use the Core Website Planning Checklist from this article to nail down your goals, audience, and sitemap
Choose Your Foundation: Browse our collection of LaunchNow Framer templates to find a design that aligns with your goals and gives you a professional head start.
Start Building: Sign up for a free Framer account, pick your template, and begin customizing. With the right plan and a premium template, your new site could be live sooner than you think.